Best Kids Braid Hairstyles 2024 with Easy Tutorial and Style Pictures
Braids are often the go-to hairstyle for many parents with young daughters. Not only do braids keep the hair neat and clean, but they also provide a good look and low-maintenance benefits. Which type of braid hairstyles are the best for children? This article will break down five trending braid hairstyles for kids to try in 2024, along with styling tutorials and pictures for each one.
Top 5 Best Kids Braid Hairstyles 2024 with Easy Tutorial and Style Pictures
There are endless braid styles that kids will enjoy. Box braids, Goddess braids, Dutch braids, Crown braids, Bubble braids, and new styles like bubble braids with crossed twists in 2024. Doing braids together can also be a bonding activity for parents and children. Cool braid patterns make getting hair done an exciting part of the morning routine.
1. Box Braid for Kids
Box braids are a sought-after hairstyle that has deep roots in African culture and has gained widespread popularity among people of African descent worldwide. This protective styling technique involves dividing the hair into small, square-shaped sections and then braiding each section from root to tip. The finished look is characterized by its neat, geometric pattern of braids that can be styled in numerous ways, offering both protection for natural hair and a wide range of creative styling options. Box braids are different from knotless braids as they create a knot at the base of each braid by looping and tying the synthetic hair, while knotless braids gradually feed in the synthetic hair as you braid without tying any knots.
Box braids are still popular for kids in 2024. On the positive side, box braids can be a protective style that helps to prevent breakage and promote hair growth in children. They can also be a low-maintenance option, reducing daily styling time. However, it's crucial to ensure that the braids are not installed too tightly, as this can cause tension on the scalp and potentially lead to hair loss. Additionally, the weight of the extensions and the time required for installation may be challenging for younger children. If opting for box braids on kids, it's advisable to choose a skilled stylist experienced in working with children's hair, use lighter extensions, and keep the braids in for a shorter duration compared to adults.
Box Braid Hairstyle Picture
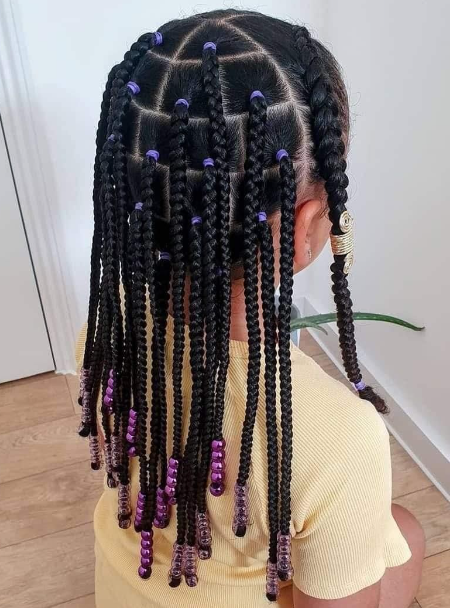
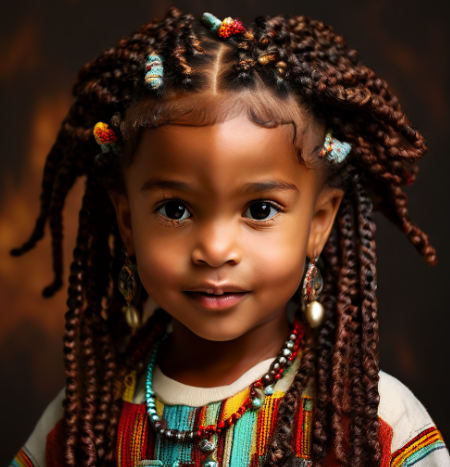
Easy Tutorial
- Preparation: Wash, deep condition, and air dry the child's hair completely before starting.
- Sectioning: Using a rat tail comb, create neat, even square parts throughout the hair by making horizontal and vertical sections.
- Moisturizing and detangling: Apply a moisturizer to each section, then gently detangle the hair using the rat tail comb, starting from the bottom and working your way up.
- Adding edge control: Apply edge control to the base of each section for a sleek look and to prevent flyaways.
- Braiding: Begin braiding at the root, keeping your fingers close to the scalp for a secure start, and continue braiding tightly but comfortably down the length of the hair, adding edge control as needed for neatness.
- Finishing the ends: When you reach the end of the hair, apply a curling jelly or leave-in conditioner to define the natural curl pattern instead of braiding all the way to the tips.
- Repeat and take breaks: Continue this process for all sections of the hair, taking breaks as needed since this style can take several hours to complete.
2. Goddess Braid for Kids
Goddess braids, also known as Boho braids, are a hairstyle that combines the structure of traditional box braids with a touch of whimsy. These braids are characterized by their larger size, raised appearance, and the incorporation of curly hair extensions throughout the braids and at the ends, resulting in a voluminous and bohemian-inspired look. While similar to cornrows in their close-to-scalp weaving technique, goddess braids stand out for their thickness and length, offering a stunning and low-maintenance option that can last for four to eight weeks. This style not only provides excellent protection for natural hair but also allows for creativity in styling, as the curly elements can be added to all or just some of the braids, depending on the desired fullness. However, it's important to note that while goddess braids offer numerous benefits, they do require a significant time investment for installation and can feel heavy due to the added extensions.
Goddess Braid Hairstyle Picture
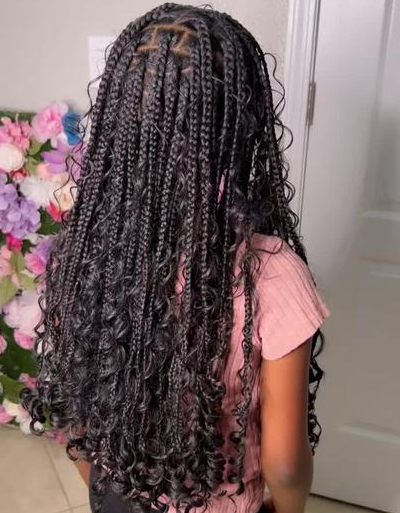
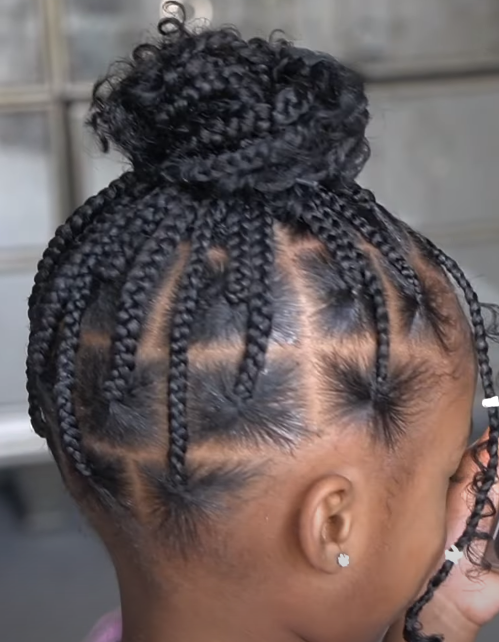
Easy Tutorial
- Preparation: Part the hair from ear to ear and down the center to create sections.
- Hair selection: Use pre-separated synthetic braiding hair, cutting it in half for toddlers to achieve an appropriate length.
- Starting the braid: Begin braiding like a regular knotless braid, adding the synthetic hair close to the roots.
- Adding hair: Use three pieces of synthetic hair per braid, incorporating them gradually as you braid down.
- Smoothing: Apply edge control at the roots and along the braid for a neat appearance.
- Sealing ends: Add product to the ends to blend them seamlessly, allowing the natural curl of the synthetic hair to show.
- Braiding pattern: Use a brick-like method with about four rows in the back, making parts larger for quicker styling.
- Boho effect: For a boho look, leave out small curly pieces as you braid, especially in the front sections.
- Finishing touches: Trim any scraggly ends and apply foam throughout the braids for extra hold.
- Styling options: Wear the braids down, with a headband, in a side part, or up in a ponytail or bun for versatility.
- Decorative elements: Add white rubber bands or gold accessories to enhance the style.
3. Dutch Braid for Kids
The Dutch braid, also known as the pineapple braid, contrary to its name, actually originated in South Africa, not the Netherlands. Its history is closely intertwined with that of the French braid, both styles being developed by African women as a means to protect their hair from sun damage. The Dutch braid's distinctive look comes from its inverted weaving technique. Unlike the French braid, where hair strands are woven over each other, the Dutch braid involves crossing the strands under one another. This reversal creates a striking, raised braid that sits on top of the head, resembling the texture of a pineapple - hence its alternative name. When multiple Dutch braids are created side by side on the scalp, they form the well-known cornrow style.
Dutch Braid Hairstyle Picture
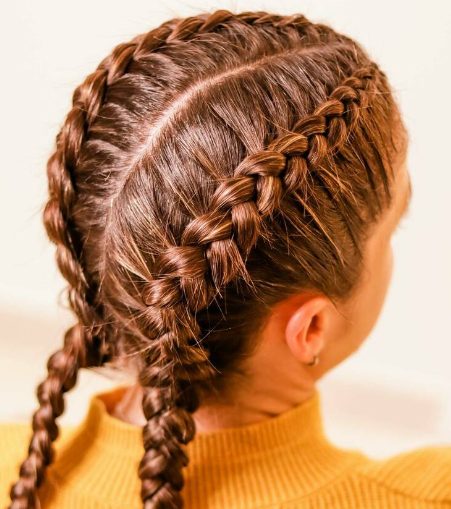
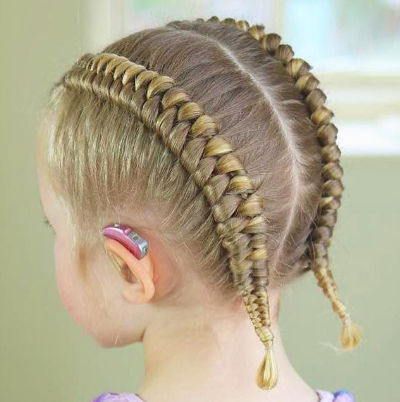
Easy Tutorial
- Start with clean, dry, or damp hair. You can spray some water on the hair to make it easier to braid.
- Part the hair down the middle into two sections. Clip or tie up one half so it's out of the way.
- Take a small triangular section of hair near the front hairline on the side you'll be braiding.
- Separate the hair into three even sections.
- Begin the braid by taking the outer-left section and lifting it up and over the middle section, then tucking it underneath.
- Take the outer-right section and lift it up and over the middle section, then tuck it underneath.
- Add a small piece of hair from the left side of the hairline to the left section.
- Braid the sections over and under as before.
- Keep braiding, adding small bits of hair from the sides into the sections as you go.
- Pull strands tight but be gentle with kids' hair. Use your fingers or comb to smooth hair into the braid.
- Spray water as needed to keep strands from pulling loose.
- Braid all the way to the end, securing with a hair tie or clip.
- Repeat on the other side of the parted hair.
4. Crown Braid for Kids
Crown braids, an elegant hairstyle, are a stunning variation of the classic French braid that creates a beautiful, crown-like effect around the head. The crown braid typically consists of multiple small braids woven horizontally around the head, forming a half-moon or circular shape that resembles a crown or tiara. Usually incorporating 8-10 separate braids, this style wraps around the entire top and sides of the head, starting from the hairline and extending towards the nape of the neck. Each section is typically created using a small French or Dutch braid technique, with hair being gathered from front to back around the head. Crown braid works well with all hair types and lengths, provided the hair is long enough on top to braid. The style can be adapted to suit both curly and straight hair and can be customized with accessories like beads or flowers for added flair.
Crown Braid Hairstyle Picture
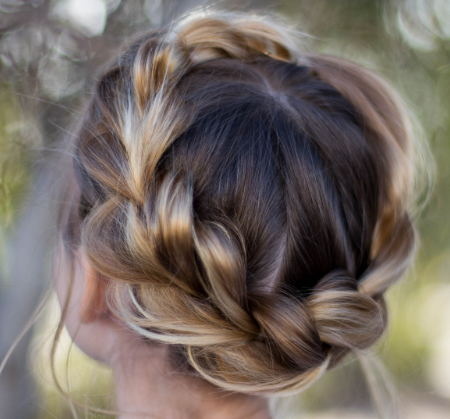
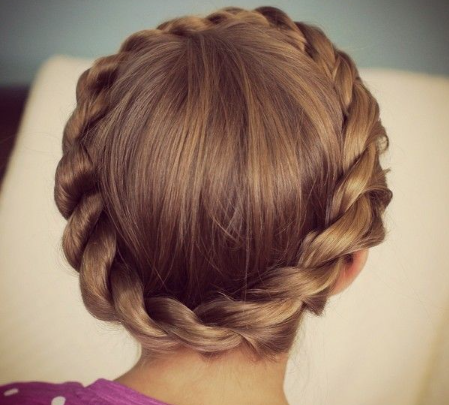
Easy Tutorial
- Start with a side part in the child's hair.
- Begin on the side with more hair by taking a small section at the front.
- Split this section into three equal parts and start a Dutch braid by crossing the strands under each other.
- As you braid, pick up hair from both sides, incorporating it into the braid as you go around the head.
- Pay attention to the braid's placement as it circles the head, ensuring it follows a consistent path.
- Occasionally pause to gently pull out the braid, making it appear fuller and larger.
- When adding hair to the braid, bring it straight up into the braid to maintain an even look.
- Aim to bring the braid up towards the crown of the head at an angle.
- Keep the hair underneath the braid as smooth as possible, especially near the face.
- Once all hair is incorporated, continue braiding the remaining length.
- If the hair is long enough, connect the end of the braid to the beginning by weaving it into the existing braid.
- Smooth out any loose pieces and tuck them into the braid for a polished finish.
5. Bubble Braid for Kids
Bubble braid hairstyles involve sectioning hair and securing it with elastics at regular intervals, resulting in a series of bubbles that give the hair a fun, voluminous look. Bubble braids are generally considered a safe style when done correctly. The key is to avoid creating the bubbles too tightly, as overly taut hairstyles can potentially lead to traction alopecia. Bubble braids offer several advantages. They work well with different hair textures and can even be used as a protective style when incorporating extensions. The style is also relatively quick and simple to create, making it an excellent option for those who want an eye-catching look without spending hours on their hair. Whether you're looking for a fun everyday style or a unique hairdo for your child, bubble braids provide a fresh, modern twist on traditional braiding techniques.
Bubble Braid Hairstyle Picture
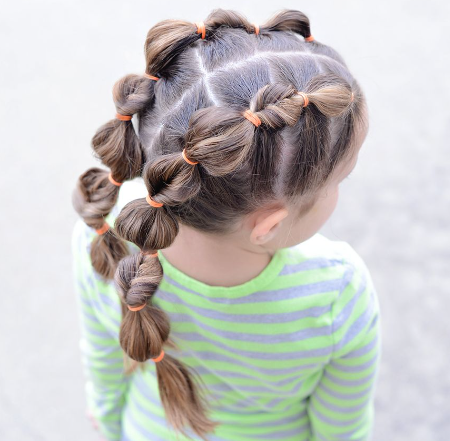
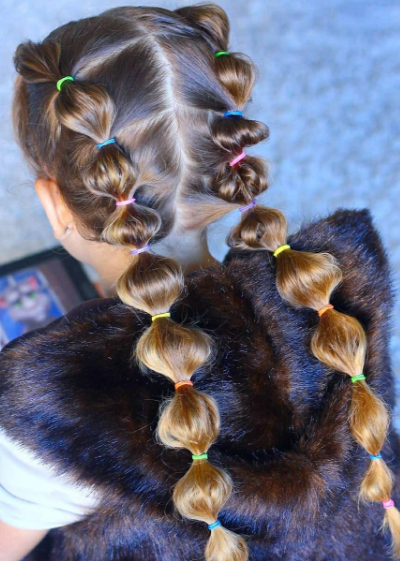
Easy Tutorial
- Start with clean, dry hair. You can brush it out first.
- Make a small triangle section in the front of your bangs and secure it back with an elastic/tie.
- Section a piece around the eyebrow level toward the back and secure with an elastic.
- Section another piece just behind the first section, again securing with an elastic.
- Continue sectioning and tying small pieces all around your head towards the back.
- Once you reach the back, section the remaining hair into a high ponytail and secure it.
- For extra volume, tease the ponytail section lightly with your fingers.
- Take each tied section and gently pull it outwards from the elastic to create puffs/bubbles.
- Use bobby pins if needed to keep sections in place behind puffs.
- Spray hair lightly if used to set the style.
- Adjust puffs as desired by separating any stuck pieces.

