
French Braid Basics, Hairstyles, Tutorial & Dutch Braid vs French Braid
Among numerous braiding hairstyles, French braid is a classic type with lots of variations. In this article, let’s understand some basics about French braids, trending hairstyles in 2025 and differences between Dutch braids and French braids, we’ll also introduce detailed tutorials for short/long hair & double braid.
What Is a French Braid?
A French braid, also known as a French plait, is a popular and elegant hairstyle that involves weaving three sections of hair together. This braiding technique begins at the crown of the head and continues down to the nape of the neck, creating a smooth, cohesive look. Unlike a standard three-strand braid, where the sections remain separate, a French braid incorporates additional hair from the sides as it is woven, resulting in a braid that appears to cascade gracefully down the back.
The origins of the term "French braid" are somewhat ambiguous. While it suggests a French influence, some theories propose that the style was popularized in America. It gained prominence in the early 20th century and first appeared in English literature in 1871. Today, the French braid remains a timeless and cherished hairstyle, admired for both its beauty and practicality.
One of the key advantages of a French braid is that this style can be adapted for different occasions, from casual outings to formal events, and works well with various hair lengths and types. For those with shorter hair or layered styles, bobby pins can help secure any loose strands, ensuring a polished finish. Additionally, French braids can be styled in various ways, including as pigtails, slanted braids, or even incorporated into an updo.
French Braid Tutorials
Despite its sophisticated appearance, the French braid can be challenging to execute, particularly when attempting to braid one's own hair. Maintaining the proper tension and ensuring an even weave requires practice. Below we’ll introduce the detailed steps for doing French braids in different situations.
French Braid Long Hair Tutorial
Step 1: Prepare Your Hair
Brush your hair thoroughly to remove any tangles or knots. This ensures smooth and even braiding.
If your hair is fine or straight, consider adding texture with a texturizing spray or backcombing to give it more grip.
Step 2: Section Your Hair
Start by gathering a triangular section of hair from the top of your head, just above your forehead. This section should include hair from your temples and extend toward the crown.
Divide this section into three equal parts: left, center, and right.
Step 3: Begin the Braid
Hold the three sections separately. Cross the left section over the center section, then cross the right section over the new center section.
This creates the first row of a traditional braid.
Step 4: Add Hair to the Braid
As you continue braiding, take small sections of hair from the sides of your head and add them to the left and right sections before crossing them over the center.
Ensure you pick up hair close to your face and neck for a more intricate and polished look.
Step 5: Continue Braiding
Repeat the process of adding hair and crossing sections over the center until you reach the nape of your neck. By this point, all your hair should be incorporated into the braid.
Step 6: Finish the Braid
Once all hair is included, continue braiding the remaining strands as a traditional three-strand braid.
Secure the end of the braid with a hair elastic. For a cleaner look, wrap a small strand of hair around the elastic and tuck it under.
Step 7: Style and Secure
Gently pull the strands of the braid to loosen it slightly, giving it a fuller appearance.
Finish with a light spray of hairspray to keep the braid in place.
French Braid Short Hair Tutorial
Step 1: Prepare Your Hair
Curl (Optional): If you want waves, you can curl your hair beforehand. Check the linked video for curling tips.
Part Your Hair: Use a comb or your fingers to create a deep side part on the left. Aim for a point close to the angle of your eyebrow.
Step 2: Section Your Hair
Grab a Diagonal Section: Take a larger section of hair starting from the part down towards the back of your head. This will be your starting point for the braid.
Step 3: Begin Braiding
Divide into Three: Lay your head slightly sideways and divide the section into three equal parts.
First Section: Take the front section (closest to your face) and overlap it over the middle section.
Second Section: Take the outer section and do the same, overlapping it over the middle.
Step 4: Add Hair on Each Side
For the front section, add a thicker piece of hair before overlapping it at the middle.
For the back section, grab a smaller piece of hair and overlap it at the middle.
Step 5: Continue Braiding
Maintain Your Direction: Each time you overlap, add more hair from the front and a little from the back, pushing the braid towards the back of your head.
Repeat this process, gradually adding larger sections from the front and smaller sections from the back.
Step 6: Finish the Braid
Stop Adding Hair: Once you reach the other side of your head, stop adding hair entirely.
Secure the Braid: Gather hair from underneath the braid (closest to your scalp) and tie it off with a clear elastic. This will help the braid lay flat.
Step 7: Add Volume
Gently Pull Apart the Braid: Carefully tug on the sections of the braid to create volume and texture, focusing on the front strands for added lift.
Step 8: Final Touches
Adjust and Style: You can finish with a light hairspray for hold if desired. Adjust any strands to achieve your preferred look.
Double French Braid Tutorial
Step 1: Preparation
Thoroughly brush your hair to remove all tangles.
Part your hair down the middle of your head from front to back.
Secure one section with a hair clip or hair tie while working on the other side.
Step 2: Make the First Braid
Start with one side and create a small triangular section at the front hairline
Divide this section into three equal parts, pulling the hair in the direction of the intended braid (toward the back)
Identify your strands: Top strand, middle strand, and bottom strand.
Apply one of the basic French braid techniques.
Method 1 - Add Hair Before Crossing:
Take the top strand plus additional hair from the same side
Cross this combined section over to the middle
Take the bottom strand plus additional hair from the same side
Cross this combined section over to the middle
Repeat these steps, adding hair each time until no loose hair remains on that side
Method 2 - Add Hair After Crossing:
Cross the top strand over to the middle
Hold all strands in one hand
Gather additional hair from the same side
Add this hair to the middle section
Repeat with the bottom strand
Continue this pattern until no loose hair remains
Step 3: Finishing the Braid
Once you've incorporated all the hair, continue with a regular three-strand braid
Secure with an elastic at the end
Step 4: Complete the Second Braid
Unclip the other section
Repeat the exact same process on the second side
Make sure to start with the same strand (top or bottom) as you did on the first side for symmetry
Step 5: Adjust
Gently pull on the edges of the braids to loosen them if desired.
Adjust any tight spots by carefully tugging the hair.
Dutch Braid vs French Braid, What Are the Differences Between Them?
Choosing between a French braid and a Dutch braid ultimately depends on your personal style and the look you want to achieve. Some people may find Dutch braids easier on their own hair after practice, while others may feel more comfortable with French braids. Similarly, how easy it is to braid someone else's hair can depend on their natural braiding style. If you prefer a classic and defined style, the French braid is a great choice. For a more adventurous and bold appearance, the Dutch braid may be the way to go.
1. Appearance
French braid creates a relatively flat look that seamlessly blends with the rest of the hair, resulting in an elegant and polished appearance. Dutch braid looks more like a 3D effect, often described as an “inside-out” braid that sits prominently on top of the hair, making it bold and eye-catching.
2. Braiding Technique
French braid involves crossing one strand over the middle strand, integrating the braid into the hair, and contributing to its flat appearance. Dutch braids are completed by crossing the strands under the middle strand, raising the braid, and enhancing its visual impact.
3. Style and Impression
French braids project a sense of youthful innocence, making it suitable for formal events like weddings and bridal showers. The braid appears soft and flowing, cascading down the head. Dutch braids create a striking and bold look, making it seem like the braid is floating above the scalp. This style is often seen as modern and trendy.
4. Ease of Creation
French braid is generally easier for braiding someone else's hair, as most people tend to naturally braid by crossing over. However, when braiding your own hair, some may find it easier to cross under, making a Dutch braid more accessible. Dutch braid may be easier for most people when braiding their own hair, as they typically cross under. However, braiding someone else’s hair might feel more intuitive if they are used to the French technique.
5. Waves and Volume
French braid tends to create beachy, S-shaped waves that start loose at the top and become more defined towards the ends, resulting in a soft, flowing texture. Dutch braid produces larger, voluminous waves due to its tighter structure, enhancing overall volume and creating a fuller look.
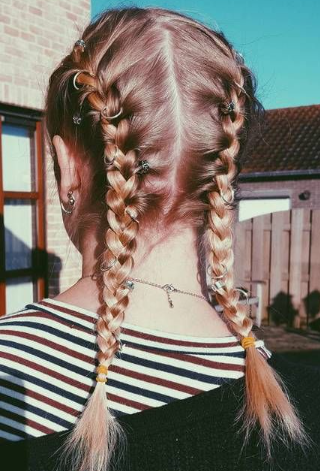
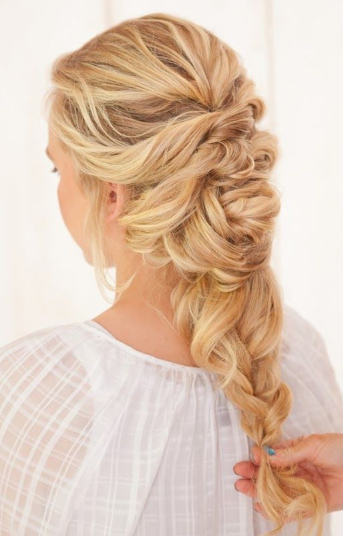
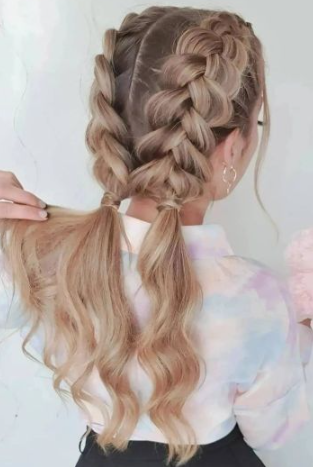
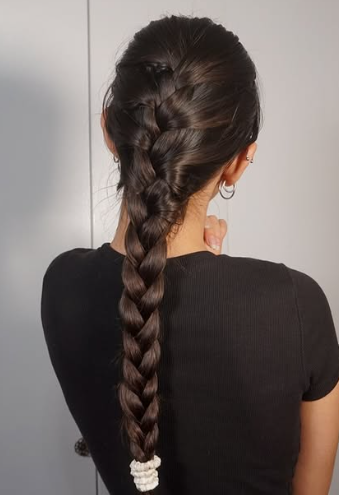
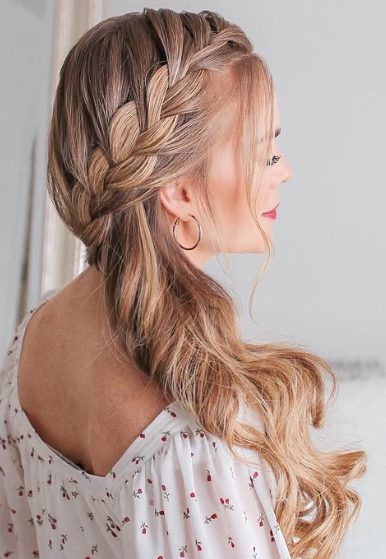
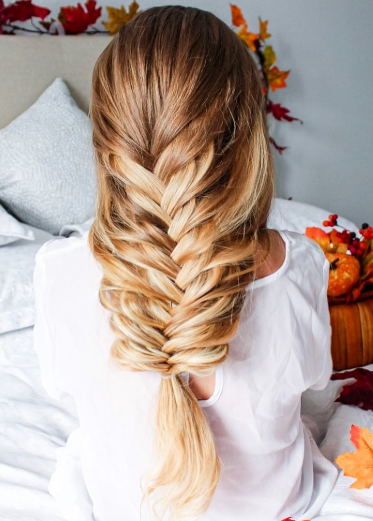
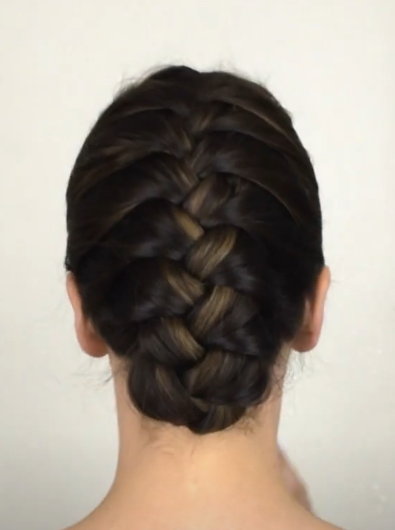
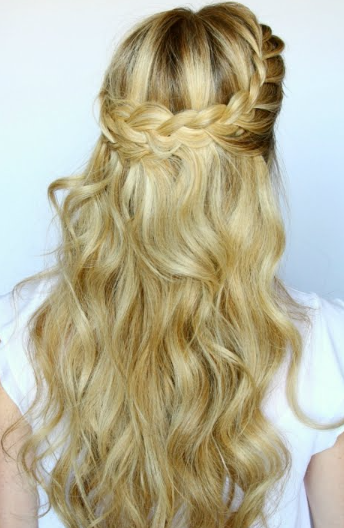
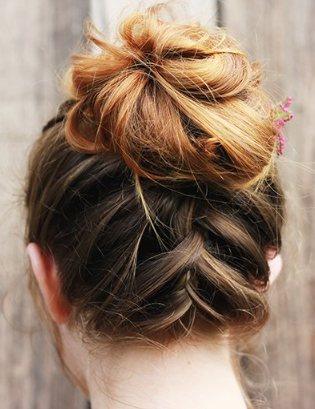
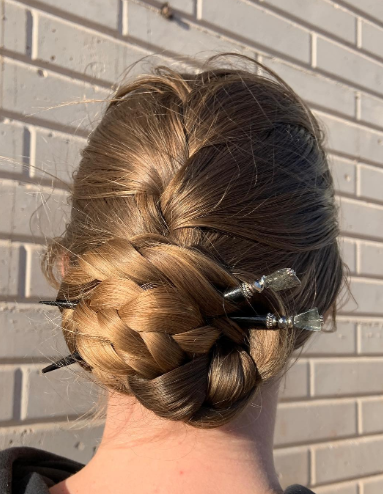
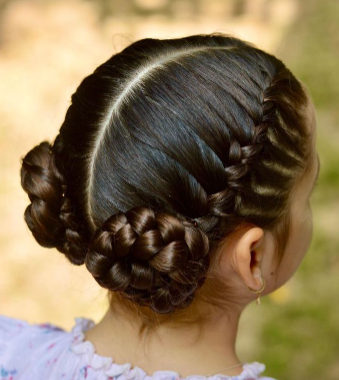
Best Trending French Braid Hairstyles 2025
For braiding enthusiasts who want to try various French braid styles, here are lots of choices, from easy to complex hairstyles. Whether you like a timeless single French braid, chic French braid ponytail, cute upside-down French braid, or elegant bun, look at these beautiful and adorable pictures.

You are one step away to access to our wholesale prices