Top 10 Easy and Quick Back-to-School Hairstyles for Girls 2024 and How to Do
After the summer vacation, the new semester is coming. When choosing a hairstyle for kids going back to school, the first priority is probably the ease of maintenance. Today we want to cover some new and latest back-to-school hairstyles for girls in 2024 with an easy and quick method to make them. Some styles are also ideal for kids with long hair.
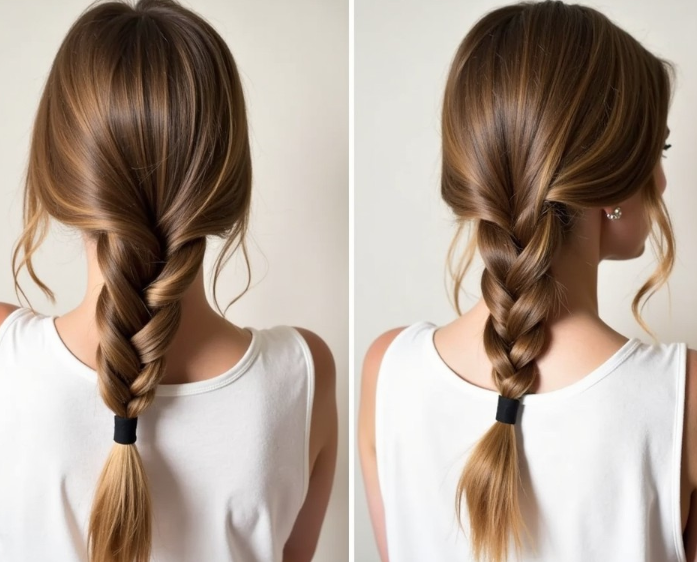
Top 10 Easy and Quick Back-to-School Hairstyles for Girls/Kids 2024 & How to Do
Girls might prefer back-to-school hairstyles that keep hair neat and tidy, reducing the need for daily styling. For example, Braids are versatile and can be worn in various styles, such as French braids, Dutch braids, or fishtail braids. They can last for several days, and protect hair from damage, particularly for girls with long or curly hair. Below are some simple back-to-school hairstyles in 2024 for girls, to help you have a cute and stylish appearance within 5 minutes or even 1 minute.
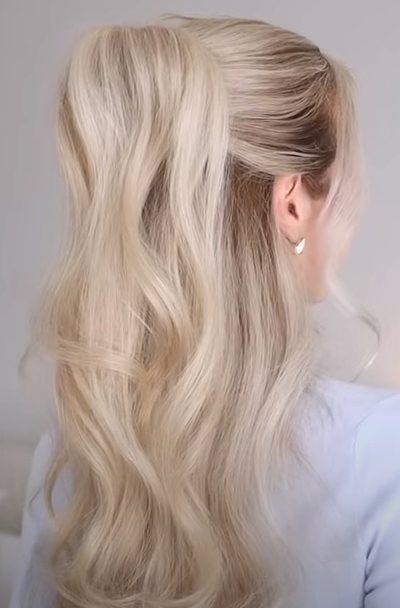
1. Half-Up Clock Clip Hairstyle
Half-up half-down hairstyles can be a great compromise between keeping hair out of the face and showing off a girl's hair length and texture. These styles can be achieved through various methods, such as twisting, braiding, or using hair clips. To achieve this easy and stylish back-to-school hairstyle, start by placing your thumbs in front of your ears and tracing upwards to the crown of your head, sectioning off the top part of your hair. Smooth your hair back with your hands, then divide the top section into two halves, creating a left and right section. Cross the right section tightly over the left, and then bring the left section up to the top of your head. Secure it with a clock clip, opening it wide and placing it over the crossed sections. Finally, flip your top ponytail down and fan it out over the clock clip to create a beautiful, voluminous look.
2. Faux Fishtail Ponytail
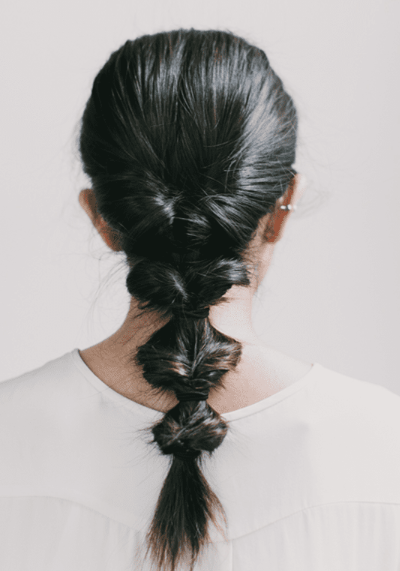
For a quick and easy school hairstyle, try this faux fishtail ponytail. Start by pulling your hair to the side and securing it with a stretchy hair tie. Create an opening just above the ponytail by pulling the hair tie down slightly, and then flip your ponytail up through the opening and tighten it. Next, pull the hair tie down about half an inch and create another opening, but this time, offset it to the right or left side to avoid creating a gap. Repeat the process, flipping your ponytail up through the opening and tightening it, then pulling the hair tie down. Continue alternating sides, creating an opening, flipping the ponytail up, and tightening it, until you reach the desired length. As you go, you may need to tighten the hair tie periodically to keep it secure.
3. Low Ponytail with a Twist
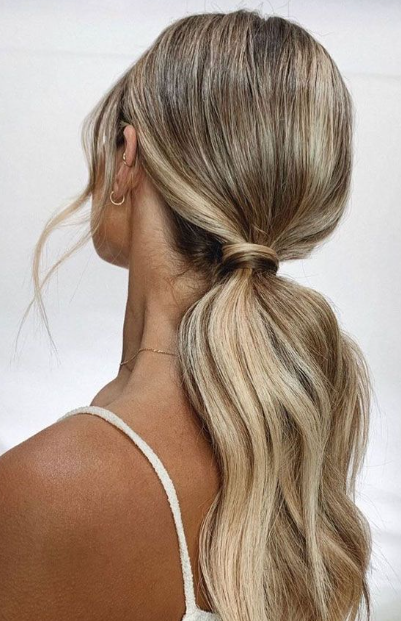
If you want to find a simple yet elegant style, this low ponytail with a twist is recommended. Start by tracing from the front of your ears to the back of your head, sectioning off the top portion of your hair, and securing it into a low ponytail. Soften the look by pinching and pulling on the sides and crown of your hair. Next, gather the lower section of hair and secure it with a small hair elastic, leaving a small loop at the end. Create a small bun by pulling the ponytail partially through the loop, and then fan it out by pulling it on the sides. To finish the look, slide your index and thumb through the bun and out the right side, grab onto your top ponytail, and pull it all the way through. Finally, slide your hair over the elastic and tighten the lower elastic to lock everything in place.
4. Rope Braid Ponytail
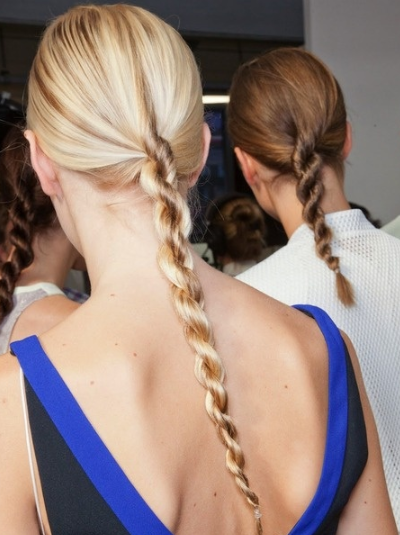
Don't be intimidated by the rope braid ponytail - it's easier than you think. Start by sectioning your hair into a high ponytail and then splitting your ponytail into two sections. Then, twist each section away from your face, either by twisting both sections together or by twisting each section around your finger. Once you've twisted both sections, take the outside section and bring it over the inside section, twisting it tight. Repeat this process, taking the outside section over the inside section, and twisting it tight each time. If your twists unravel, simply twist them again. Continue until you reach the ends of your hair, then secure with a hair tie. To check if you've done it correctly, let go of the hair tie - if the twists stay in place, you've done it right. If not, practice makes perfect, and you'll get the hang of it in no time.
5. Topsy Tail Bun
Create a quick and easy bun with this Topsy Tail technique. Start by tying your hair into a ponytail and creating an opening just above the ponytail. Next, flip your ends up through the loop to create a Topsy Tail, and tighten it slightly. Then, grab the Topsy Tail and your ends, and bring them back up and through the loop again. Tighten it to secure, and you'll have a cute bun in just a few seconds.
6. Claw Clip Messy Bun
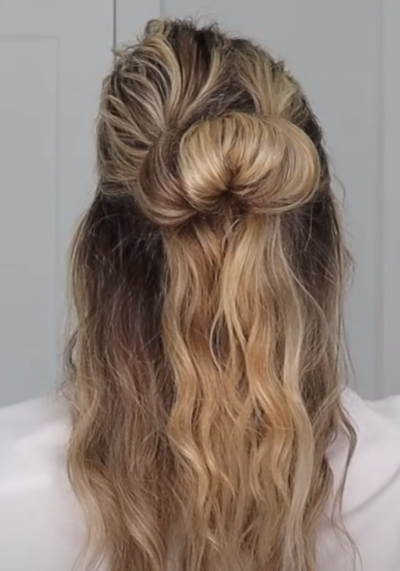
To create this graduation hairstyle, start by gathering all your hair into a low ponytail using your right hand. Wrap the base of your ponytail up and over your index and middle finger on your left hand, moving it to the right. Twist your fingers to the left two or three times as you bring them to the top of your head, continuing to twist until your ends are out of the way. Now, secure your twisted hair into a bun using a claw clip. Remember that the position of the top of the clip will determine where your bun will sit. Take your ends and loop them to the left, forming the top of your bun. Secure this part with a few bobby pins. Next, loop your ends down and across the top of your claw clip to the right. Carefully open the clip and tuck your ends underneath, securing them into place. Finally, gently pull out any loose pieces for a fuller, messier look.
7. Middle Bun with Twisted Knots
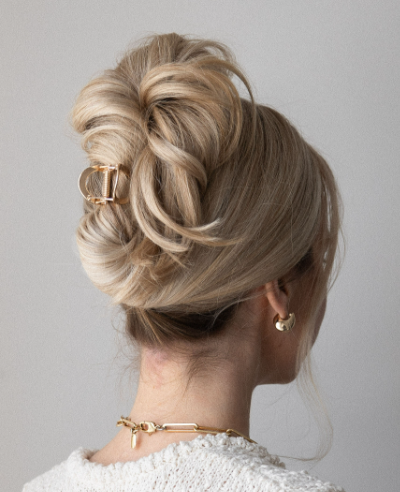
Firstly, part your hair down the middle and slick it back a bit, not creating a high or low bun, but placing it right in the middle. Use a slick-back styling product if needed. For a neater appearance, part your hair further down the middle. Then, create a knot at the top by crossing your sections and pulling them through. Tighten the knot and then create a second knot at the bottom, following the same process. Taking your sections of hair, twist them once overhead, leaving them hanging out. Alternatively, you can keep them tucked in for a cleaner look. Finally, secure the twisted sections with a hair tie.
8. Twisted Low Ponytail Wrap
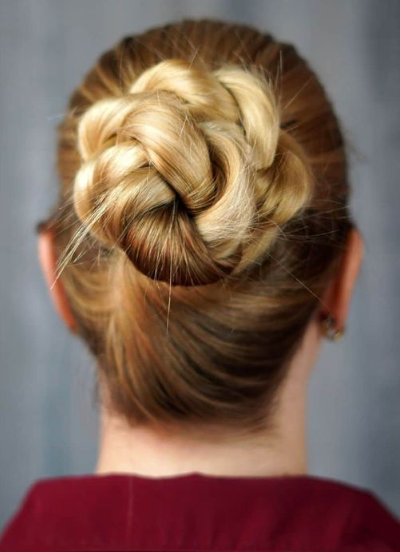
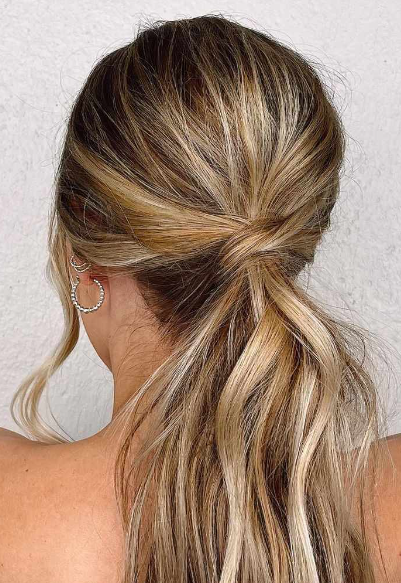
Create a soft low ponytail wrap by placing your fingers at your part, a few inches back from your hairline, and tracing down until you reach the back of your ears. Section off the side sections and smooth them back, securing them at the back of your head just above your nape. Slide your elastic down just enough to allow you to easily slide your index finger and thumb under and in between the side sections. Once through, twist your hand a half turn to the left, and with your left hand, gather all of the remaining hair. Grab it with your right hand and pull it up all the way through. Tighten your lower elastic and gently pull on the sides of your right section to accentuate the twist detail. This hairstyle is perfect for going back to school, with a soft and beautiful finish.
9. Pencil Updo
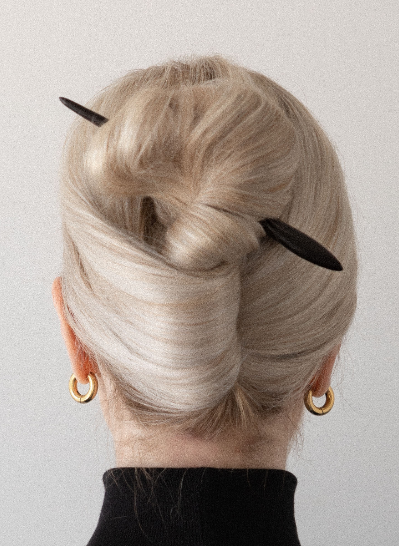
This can be done by gathering your hair in your left hand and placing a pencil behind your left hand, parallel to your head. Bring your ponytail up and over the pencil to the left, then twist the pencil a half turn to the right as you bring it to the top of your head. The twist should feel tight. Next, pinch the full left side of your twist with your left hand, then push the tip of the pencil against your head as you flip it to the right, pushing out and over the left side of your twist. This will connect your twist to your head. Finally, tightly twist and tuck your ends underneath to secure the updo.
10. Three-Strand Braid Ponytail
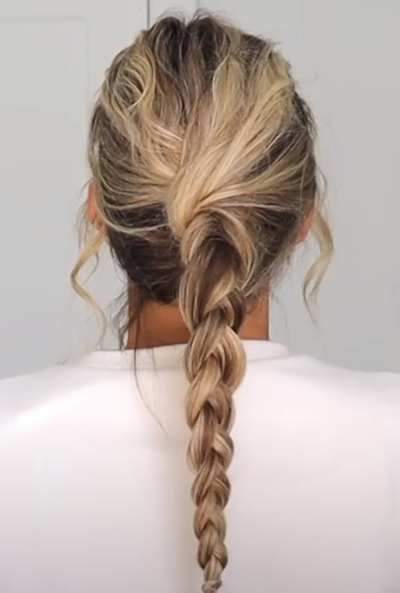
The last one is a braid hairstyle for school. Start by leaving some hair out in front, if desired, and then take a section on your right and a section on your left. Combine them and put your fingers through, turning them to create an opening. Pull your hair through the opening and tighten it, creating a top section and a bottom section. Take the top section and split it into two, then combine it with the bottom section as your third strand. Begin a regular three-strand braid, crossing the outside section under the middle, then the outside section under the middle, and continue all the way down.
What back-to-school hairstyles are the best for girls with short hair?
The above hairstyles tend to be more suited for girls with long hair, what cute back-to-school hairstyles are the best for girls with short hair?
- Space buns: Divide your hair into two sections and secure each into a small, high bun at the crown of your head. This look is playful and fun.
- Double hidden ponytail: Creates the illusion of a longer ponytail by stacking two half-ponies on top of each other. Great for when you want your hair up quickly.
- Headband: Pick a colorful, patterned headband to neatly sweep back your hair.
- Topsy tail braid: Gather hair into three sections and braid each, turning them into topsy tails. Provides versatility to wear multiple days while looking put together. Easy to do and keeps hair out of the face.
- Side-swept bangs: Sweep your bangs to one side for a sleek look. You can curl or straighten the bangs for some texture.
- Top knot: Gather all your hair atop your head and secure it tightly with an elastic for a polished vibe.
- Textured crop: Use a sea salt spray or dry shampoo to add volume and beachy waves/curls to your shortcut.
Which type of back-to-school hairstyle to choose for straight, wavy, or curly hair?
Choose hairstyles suitable for your hair's natural texture rather than fighting against it. Wavy hair works well for beachy waves or braids while straight hair lends itself to smooth ponytails or half-up styles. When it comes to hairstyles for kids with curly hair, easier styles are best for young kids, and consider styles that limit breakage like braids, buns, and ponytails, these do not pull on hair as much. Then protective styles like twists and knots can last several days. Keep it simple and factor in your child's age and patience for styling.
Consider sprays or gels to add extra hold if needed. The texture should last from the first period through after-school activities without fussing. Durable styles will save you trouble throughout busy school days.

