Top 5 Best Hairstyles For Christmas 2023 - Holiday Hair Tutorial 2023
The holidays are an exciting time to get festive with your hair as well as your wardrobe and home decor. Whether you're spending time with family, going to parties, or attending Christmas mass, having a fun, on-trend hairstyle can get you in the merry spirit. Today in the Christmas hair tutorial, we've got 5 easy holiday hairstyles for Christmas!
Christmas Hairstyle Guide 2023 - Top 5 Best & Easiest Holiday Hairstyles 2023
This year, hairstylists and celebrity hair masters are forecasting some standout looks that are sure to wow. From playful curls and braids to glam waves and sleek buns, there are stylish options for every length and texture. In this Christmas Hairstyle guide 2023, we'll break down the top 5 best holiday hairstyles that will have everyone asking where you got your locks done. From nostalgic vibes to modern twists on classics, these festive 'dos are guaranteed to make you the best-dressed person under the mistletoe this holiday season. Read on to find your perfect Christmas 2023 hairstyle match!
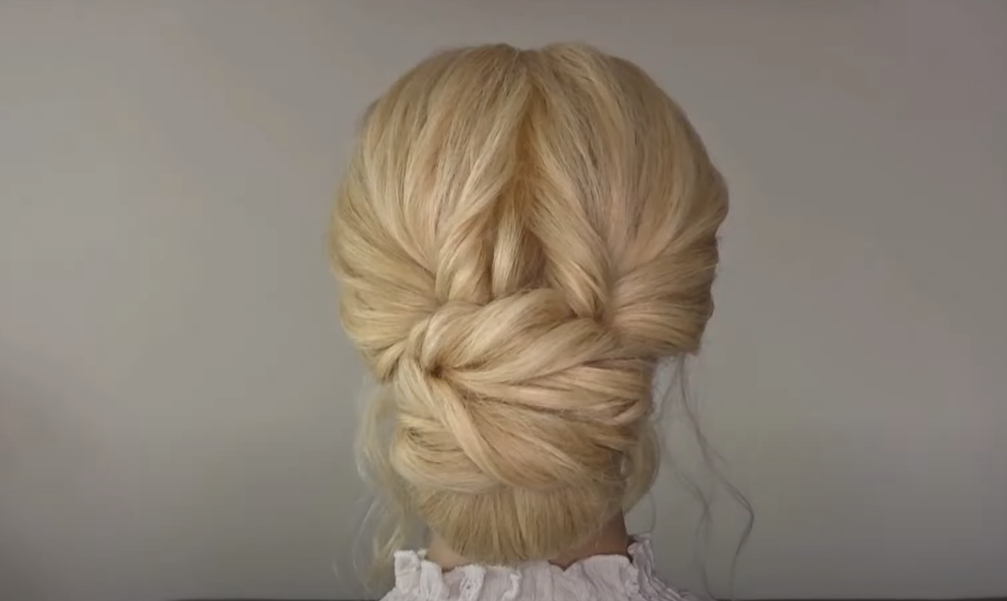
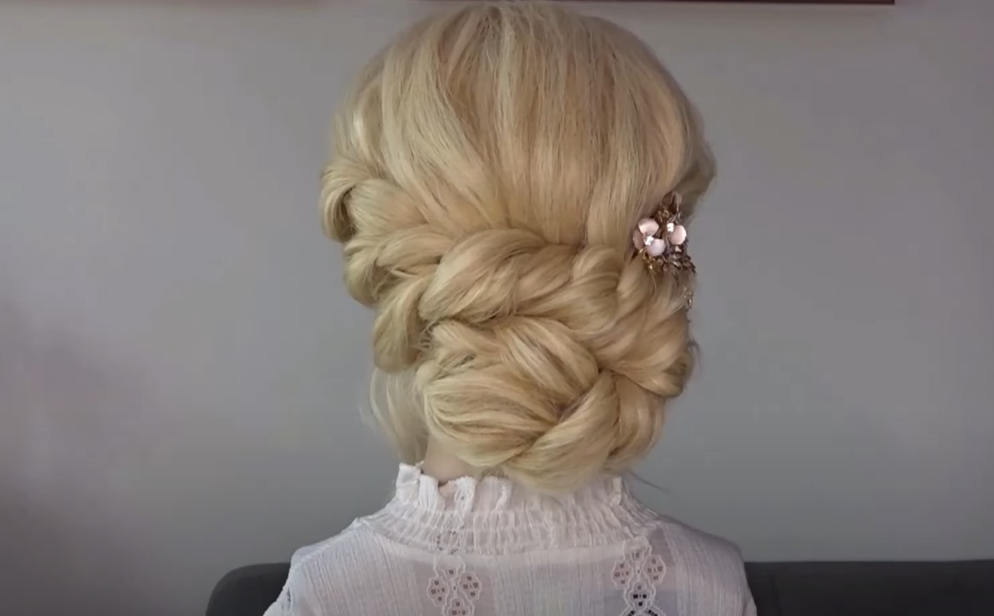
1. Twisted Chignon Hairstyle

Sectioning and Tying:
Take a small section of hair from above the ear to the middle of the back of the head on the right side.
Tie the section with a clear elastic band.
Repeat on the left side, tying another section with a clear elastic band.
Creating Twists:
Use your fingers to create a long hole above each elastic band.
Pass the ponytail through the hole to create a twist on each side.
Apply texture spray to both twists.
Pinching and Pulling:
Gently pinch and pull the hair at the crown and along both sides of the twists on both sides to create messy volume.
Tying into a Low Ponytail:
Gather the remaining hair and tie it into a low ponytail.
Adding Another Elastic Band:
About shoulder height along the ponytail, add a clear elastic band.
Twisting the Ponytail:
Split the end sections in half.
Twist each section by rolling it underneath itself until it meets the nape of the neck.
Secure it to the nape of the neck with bobby pins.
Twisting Side Sections:
On the right side, add a small elastic band to a side section.
Create a hole and pull the ends through to form another twist.
Repeat the process on the left side.
Applying Texture Spray and Pinching:
Apply texture spray to both twists.
Pinch and pull the hair to create messy volume on both sides.
Combining Twists:
On the right side, pass your hands through the middle of the twist.
Grab the left-hand twist and pull it through the hole.
Secure each side with bobby pins.
Hiding Tail Ends:
To make the tail ends disappear, wrap them around a bobby pin.
Tuck the wrapped ends up and underneath the twist.
Repeat the same steps on the left side.
2. Low Twisted Messy Bun Hairstyle

Initial Twisting:
Take a slice of hair from the top of the head and one directly underneath it.
Bring the bottom section over the top section.
Every time you cross over the bottom section, add a chunk of hair from the hairline.
Continue twisting around until reaching the bottom left-hand side of the hair at the nape of the neck.
Secure with bobby pins.
Applying Texture Spray:
Apply texture spray all over the hair for added texture.
Pinching and Pulling:
Use your fingers to gently pinch and pull the twisted section apart, creating a messy and textured look.
Creating the Pull-Through Braid:
Take a slice of hair from the bottom left-hand side and a slice from the right.
Join them together with a clear elastic band.
Pinch and pull to create texture.
Repeat this process until you run out of hair at the front of the head.
Pull-Through Braid on the Ponytail:
Take hair from the hanging down section and a slice on both sides.
Bring them in front of the ponytail and join them together with a clear elastic band.
Pinch and pull to loosen.
Repeat this process all the way down the ponytail until reaching the end.
Rolling and Securing the Braid:
Take the pull-through braid and bring it over to the left-hand side.
Roll the ends underneath to hide them.
Hold it to the nape of the neck and secure it with bobby pins all the way around the little bun.
Final Touch:
Ensure that the twisted messy bun is secure and well-formed.
Adjust as needed and use additional bobby pins if necessary.
3. Braided Updo

Leave-Out for Face Framing:
Start by leaving some hair out to frame the face.
Sectioning:
Section off the hair from the top of the ears straight across, creating a top and bottom section.
Three-Strand Braid (Top Section):
Brush the top section towards the right side of the head.
Do a regular three-strand braid all the way down to the bottom of the hair.
Tie it off with a clear elastic band.
Rope Braid (Bottom Section):
Bring the bottom section over to the left side.
Split the hair in half.
Twist both sections to the left.
Cross the left strand over the right strand.
Continue twisting and crossing until reaching the end of the hair.
Tie off with another elastic band.
Creating Loops:
Take the three-strand braid and create a little loop at the bottom by pulling the ends almost through the elastic.
Position it coming over to the left.
Fold it twice until it reaches the back of the ear on the left side.
Secure it along the braid with bobby pins.
Creating Loops for the Rope Braid:
Take the rope braid and create a loop by pulling the ends partway through the elastic.
Fold it twice until it is the same size as the loop from the three-strand braid.
Push it up against the three-strand braid.
Secure it with bobby pins.
Final Touch:
Adjust the loops and braids as needed to achieve the desired look.
Secure any loose sections with additional bobby pins.
4. Beautiful Messy Chignon Hairstyle

Leave-Out for Face Framing:
Begin by leaving some hair out to frame the face.
Side Sections:
Take a slice of hair from the top of the head to just above the ear on both sides.
Securing Side Sections:
Bring both side sections around to the back of the head.
Secure them together with a clear elastic band.
Creating Twists:
Pass a couple of fingers behind the ponytail.
Pass the ends up and pull them all the way through to create a twist.
Repeat the twisting process twice.
Applying Texture Spray and Pinching:
Apply texture spray all over the top of the head.
Gently pinch and pull at the twists and the crown area for added volume.
Securing Twists with Bobby Pins:
Slip a couple of bobby pins through the middle of the twists to keep them secure to the head.
Creating Low Ponytail:
Gather the remaining hair into a low ponytail.
Dividing Ponytail:
Divide the ponytail in half.
On the right side, place a clear elastic band about shoulder height.
Creating Twists on Ponytail:
Make a hole above the elastic band.
Pass your fingers through and pull the ends through the hole.
Repeat the process on the left side.
Applying Texture Spray and Pinching (Ponytail Twists):
Apply more texture spray to the twists on the ponytail.
Gently pinch and pull at the edges to create more volume.
Crossing Ponytail Twists Over the Bun:
Take the right-hand ponytail and pass fingers behind the left-hand twist.
Grab the ponytail and pull it through to the elastic band.
Secure it to the head with bobby pins.
Repeat the process on the other side.
Joining Two Sections Under the Bun:
Join the two remaining sections under the bun with another elastic band.
Creating Twists Under the Bun:
Pass fingers behind the elastic band.
Pull the ponytail through the hole twice to create a tighter twist.
Pull on the ends to tighten it up until it reaches the bun.
Securing Twists and Final Touch:
Secure those twists to the side of the head with bobby pins.
Apply texture spray to the twists and pinch and pull for added texture.
Final Loop at the Bottom:
Tie a clear elastic band and create a loop with the remaining hair.
Roll the loop up until it meets the bun.
Secure it at the bottom of the bun with bobby pins.
5. Wavy Half-Up Half-Down Hairstyle:

Preparation:
- Start with loosely curled or waved hair.
Sectioning:
- Leave out some hair to frame the face.
- Take a small section of hair from above the ear on one side.
- Repeat on the opposite side.
First Ponytail:
- Bring the sections together at the back of the head just above ear height.
- Secure them together with a clear elastic band.
Second Ponytail:
- Take another small slice of hair from just behind the ear, below the first section.
- Repeat on the opposite side.
- Bring these sections together at the back of the head just over the top of the first ponytail.
- Tie them together with a clear elastic band.
Topsy Tail Tool:
- Use a Topsy Tail tool to create twists.
Twisting the Ponytails:
- Slip the Topsy Tail tool behind both ponytails.
- Take the top ponytail, pass the ends through the loop, and pull to create a twist.
- Repeat this process.
- Secure the twists with bobby pins.
Texture Spray and Pinching:
- Apply texture spray to both twists.
- Use your fingers to pinch and pull the twists for a messy look.
- Secure with bobby pins to keep them close to the head.
Finishing Touch:
Repeat the pinching and pulling on the opposite side.

